Last updated on February 8th, 2018 at 11:11 pm
 Felted Dryer Balls
If you’re concerned about the chemicals in dryer sheets and dryer balls, here’s a alternative to make yourself; DIY dryer balls that you can make from natural wool yarn. Just toss the dryer balls into the dryer with your laundry and let them bounce around to soften clothes and absorb static cling.
Size:
You can make the dryer balls to any convenient size, but the ones you can buy are about nine inches around. Since the natural wool balls shrink a little prior to felting, you can make them about ten or so inches in circumference to get a finished size similar to the commercial dryer balls.
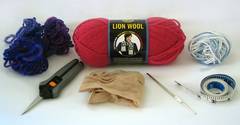 Supplies:
- Wool Yarn – here’s a great opportunity to recycle your leftover wool or yarn scraps. For the best results, use a yarn that is 100% wool or otherwise is a good felting yarn. Do not use superwash wool. Machine washable yarns aren’t any good for this project! Local stores will carry lots of good, cheap, felting wool yarns.The amount of yarn needed depends on the weight and gauge of the yarn used; obviously, chunky yarn will wind faster and you’ll need less. For a dryer ball made of worsted weight wool yarn, you’ll need about 3 ounces.
- Old Pantyhose or a Sock
- Cotton or Acrylic Yarn or String: You can use scraps here, too. This will be used to tie the hose or sock. You don’t want this to felt, so don’t use the wool yarn here.
- Scissors
- Crochet Hook
- Measuring Tape
 Step 1: Winding the Core
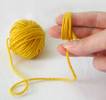
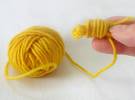
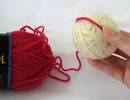
Begin making the core of the ball by winding a bit of yarn around your fingers.
Once you have a bit done, take it off your fingers, let it close and wrap the yarn around it. This is the beginning of your ball.
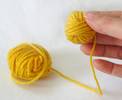
 Continue wrapping the yarn around and forming a little ball. There is no right or wrong way to do this step, as this will be completely covered up later on.
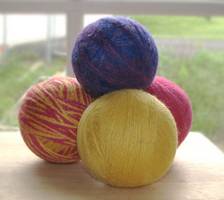
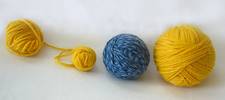
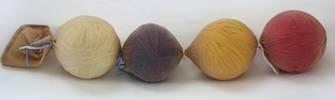
This picture at right shows a small beginning ball, a ball ready for the first felting and a ball that is ready for the last felting. This should give you an idea of approximate sizes.
 Once you have a small ball, break(or cut) the yarn and tuck the end under using the crochet hook. This will keep it from coming loose during felting.
Step 2: Felting the Core
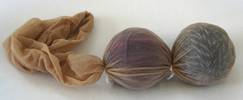 Put your small wool balls into a length of pantyhose or knee-high sock. Tie the hose closed between each ball with a piece of string or non-wool yarn, using a secure knot. This will keep the balls separated during felting.
Toss the wool ball pantyhose caterpillar into your washer with a load of laundry. Hot water will help the felting process. If you have used a hand-dyed yarn, or wool that is not colorfast, be aware that the dye may run.
Once the dryer balls have been washed and dried, cut the strings between the hose and remove them. They should be slightly felted. If you want them felted more, run them through another load.
 Step 3: Winding the Dryer Ball
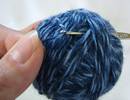
Begin winding more wool yarn onto the ball and continue winding until the ball is the size you want. Tuck the end under using the crochet hook.
Step 4: Final Felting
 Once you have your dryer balls the size you would like, put them into the pantyhose again, tie them, and repeat the felting process. The balls don’t have to be completely felted before you can start using them; just slightly felted will do, so they won’t come apart. They will continue to felt and get harder as you use them.
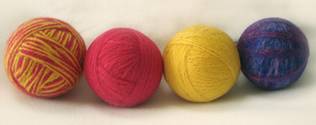
Your natural wool dryer balls are now finished. It is possible they will develop little pill balls with continued use; if so, just remove them with a sweater shaver.
Adapted from Make your Own Wool Dryer Balls by goodmama, inc., licensed under a Creative Commons Attribution-Share Alike 3.0 United States License.